Wednesday, April 29, 2009

Daring Bakers: Abbey's Infamous Cheesecake Recipe

(recipe via Jenny Bakes)

Abbey's Infamous Cheesecake:

crust:
2 cups / 180 g graham cracker crumbs
1 stick / 4 oz butter, melted
2 tbsp. / 24 g sugar
1 tsp. vanilla extract

cheesecake:
3 sticks of cream cheese, 8 oz each (total of 24 oz) room temperature
1 cup / 210 g sugar
3 large eggs
1 cup / 8 oz heavy cream
1 tbsp. lemon juice
1 tbsp. vanilla extract (or the innards of a vanilla bean)
1 tbsp liqueur, optional, but choose what will work well with your cheesecake

DIRECTIONS:
1. Preheat oven to 350 degrees F (Gas Mark 4 = 180C = Moderate heat). Begin to boil a large pot of water for the water bath.

2. Mix together the crust ingredients and press into your preferred pan. You can press the crust just into the bottom, or up the sides of the pan too - baker's choice. Set crust aside.

3. Combine cream cheese and sugar in the bowl of a stand-mixer (or in a large bowl if using a hand-mixer) and cream together until smooth. Add eggs, one at a time, fully incorporating each before adding the next. Make sure to scrape down the bowl in between each egg. Add heavy cream, vanilla, lemon juice, and alcohol and blend until smooth and creamy.

4. Pour batter into prepared crust and tap the pan on the counter a few times to bring all air bubbles to the surface. Place pan into a larger pan and pour boiling water into the larger pan until halfway up the side of the cheesecake pan. If cheesecake pan is not airtight, cover bottom securely with foil before adding water.

5. Bake 45 to 55 minutes, until it is almost done - this can be hard to judge, but you're looking for the cake to hold together, but still have a lot of jiggle to it in the center. You don't want it to be completely firm at this stage. Close the oven door, turn the heat off, and let rest in the cooling oven for one hour. This lets the cake finish cooking and cool down gently enough so that it won't crack on the top. After one hour, remove cheesecake from oven and lift carefully out of water bath. Let it finish cooling on the counter, and then cover and put in the fridge to chill. Once fully chilled, it is ready to serve.

Pan note: The creator of this recipe used to use a springform pan, but no matter how well she wrapped the thing in tin foil, water would always seep in and make the crust soggy. Now she uses one of those 1-use foil "casserole" shaped pans from the grocery store. They're 8 or 9 inches wide and really deep, and best of all, water-tight. When it comes time to serve, just cut the foil away.

Prep notes: While the actual making of this cheesecake is a minimal time commitment, it does need to bake for almost an hour, cool in the oven for an hour, and chill overnight before it is served. Please plan accordingly!
Tuesday, April 28, 2009

Daring Bakers: Abbey's Infamous Cheesecake

The April 2009 challenge is hosted by Jenny from Jenny Bakes. She has chosen Abbey's Infamous Cheesecake as the challenge.


This is a basic cheesecake recipe developed by her friend Abbey T., who has made infinite flavor modifications to this basic recipe with great success. Basically, you can take this recipe and easily tweak it to create any flavor cheesecake you desire. I decided to go for a Neapolitan effect, inspired by the classic ice cream flavor.


I planned to make the basic batter, then split it in thirds and add strawberry puree to one portion and melted chocolate to another, but then I realized how neatly the recipe divides in to third. Since it calls for three blocks of cream cheese and three eggs, and all the flavorings are listed in tablespoons (1 tablespoon = 3 teaspoons), making the batter in thirds seemed like a really easy way to ensure even flavor distribution.


Oddly, despite my equitable distribrution of ingredients, the chocolate portion came out notably thicker than the other two. I expected the strawberry puree to thin the batter a bit, but it didn't really: the pink and plain batters had the same consistency. I ended up using cocoa powder instead of melted chocolate, but even so, I used about a tablespoon, which doesn't seem like enough to significantly alter the consistency. But it did. Once baked, there wasn't a noticeably difference in texture, but the chocolate layer held up better than the strawberry and vanilla.


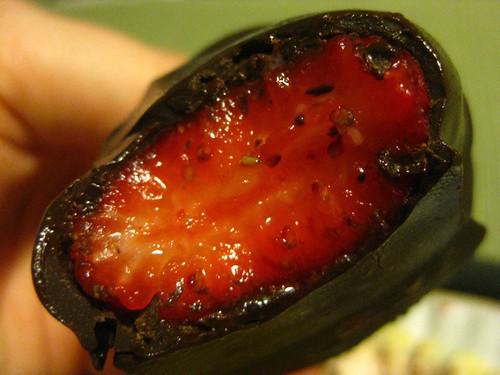
To top it off, I dipped some strawberries in dark chocolate. Delicious! 

I would definitely recommend this cheesecake recipe. It's definitely rich, but not so rich that just a bite or two makes you say, "Enough!" In that way, it's actually pretty dangerous - it's just mild enough to make you want one more bite. Every time. So, with that in mind, proceed with caution.

This post is already long, so I'll post the recipe separately.

Wednesday, April 15, 2009

Sandwiches, part 2

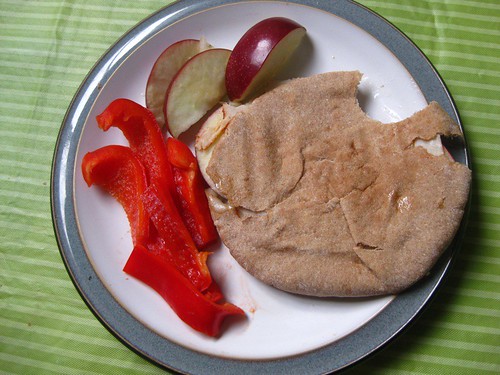
Sandwiches again! This time on mini pita bread, but once again grilled. I had turkey with apple slices and cheddar, with more apple slices and some red pepper strips on the side.


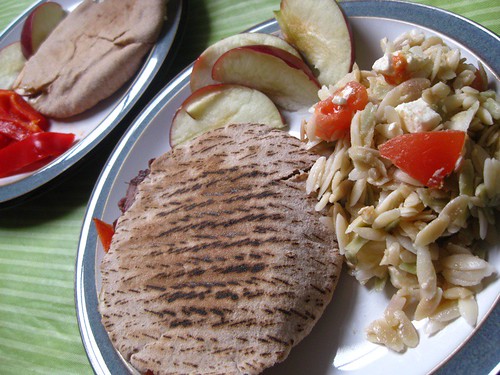
Dan had roast beef, turkey, cheddar, and red peppers in his sandwich, with apples slices and some leftover pasta salad (orzo with olive oil, tomato, and feta). His metabolism is so fast it should require a seatbelt, so he can handle the extra carbs.

These are store-bought mini pitas. I keep meaning to make pitas - they are really simple, only a handful of ingredients - but I just haven't had the time recently. Maybe next week!

Cheese, glorious cheese!

I'm sure I've mentioned this before, but it bears repeating: we are serious cheese freaks. We LOVE cheese. We'd basically eat nothing but cheese if I didn't exert serious restraint and monitor our cheese consumption. Of course, living on the Vermont border, we have access to loads of amazing local cheeses, which we enjoy, but because we eat so much cheese, we also need a more utilitarian, run-of-the-mill, basic, everyday cheese. We call this "snack cheese" (as opposed to "special cheese" or "cooking cheese").


Lately our grocery store has been having amazing specials on cheese, bringing our standard snacking cheddar down to only $2.99 a pound, so of course we've been stocking up. With all that cheese on hand, however, the danger is that we'll go overboard and eat way too much cheese (yes, hard to believe, but there is such a thing). So we've rationed it. I figure that between the two of us, one 8-oz bar of cheddar per week is sufficient (especially since that's not the only cheese we eat - that's just for simple snacks). When the price drops this low, the limit is six bars at a time, so in theory, the supply should last six weeks.

We've done shockingly well with this allotment, even having some bars of cheese last longer than a week. The timing also works out well because it seems like Price Chopper runs this special around every six weeks - so right as we're running out, we can stock up again. Perfect.

When we lived in London, there was a greater variety of cheap cheeses in the supermarkets there, and we enjoyed trying out as many different kinds as possible. I especially liked to toss some Red Leicester in my mac and cheese, and we enjoyed Stilton with apricots on oat cakes. Mmmm, yummy! And of course the cheddar was great - more sharp aLinknd crumbly than supermarket cheddar here. Hard to believe it's been four years since we moved back!

What are your favorite cheeses? Anything we should try? I'm thinking a cheese taste-test series on the blog would be an excellent excuse to buy more cheese!

Tuesday, April 14, 2009

Sandwiches, part 1

To tell the truth, I've never really liked sandwiches. Other than peanut butter and fluff, which is really more like dessert (and we all know I love dessert), squishing things between bread has just never had much appeal for me. I like a lot of the things that go in to sandwiches, but given the choice, I'd rather eat them separately. I would often do just that; when I started packing my own lunches in third grade, I'd often pack some bread, a chunk of cheese, a piece of meat, maybe some sliced cucumbers... all wrapped and eaten separately.


But there is one caveat: throw a sandwich, even one I would normally gag at, on the grill, and bingo! I'm salivating. I think I first encountered the concept of panini when I first went to London at seventeen; there were a lot of little panini shops near my fashion school in the Tottenham Court Road area, and, other than the carrot-ginger soup from Pret a Manger, the panini became my favorite lunch option.

Last week was cold and drizzly here, and one day in particular was absolutely a grilled-cheese-and-tomato-soup kind of day. (Grilled cheese, of course, has always been the one exception to my sandwich indifference.) We had neither bread nor tomato soup nor ingredients for tomato soup on hand, so I called Dan and asked him to pick up sandwich fixings; by the time we got off the phone, we agreed that some kind of deli meat would be good. My only specific request was avocado (I'm on an avocado kick again) but left the details up to him.

He brought home turkey, roast beef, provolone, a tomato, some crimini mushrooms, and the obligatory avocado, along with a nice, crusty loaf of sourdough. We used everything for the sandwiches except the mushrooms (later served sauteed with scrambled eggs). After a few minutes on our little Foreman grill, the bread was toasty, the cheese was melted, and the combination was perfect. We ate at the kitchen table while tossing the Yahtzee dice, under cover of the skylight, hammered by the rain.

Monday, April 13, 2009

This Should Help

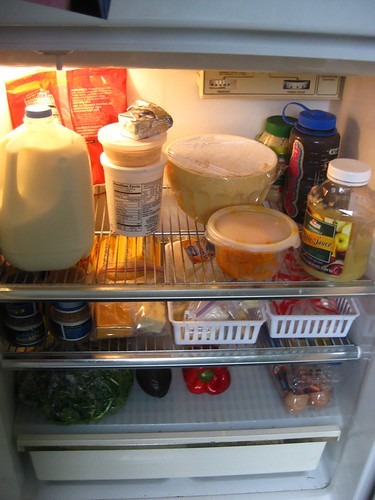
I finally got around to cleaning out and organizing my fridge this weekend; this should help somewhat with meal planning, since it will be much easier now to see what we have on hand. I bought the white plastic baskets on the middle shelf at Walmart - only $1 for the pair. One holds deli meat, which we don't often buy, but we've been on a sandwich kick lately; the other holds some of the many, many different kinds of cheese we have. (We are serious cheese addicts.)


On Friday, I stocked up on lunch items and healthy snacks to prepare for my month-long stint in a real office. Working from home, I don't really plan what I eat, since I can just wander to the kitchen whenever I'm hungry and cook whatever I feel like. Since I won't be able to do that anymore, I want to have healthy options to bring for lunch and snacks. I splurged a bit and bought some pre-packaged items I usually avoid (e.g., individually-wrapped Laughing Cow cheese wedges, Breyer's yogurts with mix-ins, etc.), so our grocery bills will be higher this month, but I figure it's an okay price to pay in order to ensure that I don't get hungry mid-afternoon and hit the vending machine.

I also bought some Fiber One toaster pastries as a grab-and-go breakfast option; since I can no longer set my own work (and therefore sleep) hours, I may be in a rush some mornings and I figure one of those plus an apple is better (and cheaper) than heading to the Dirt Cowboy (local coffee shop) for a steamer and a pastry.

Thursday, April 9, 2009

Book Review: Tender at the Bone

Ruth Reichl's Tender at the Bone is a fantastic read for any foodie. Reichl, the editor-in-chief of Gourmet magazine and a former New York Times food critic, transports us with mouthwatering details back to her most formative food experiences as she immerses herself in everything from finest French cuisine to freeganism. Through various iterations of her identity - lonely schoolgirl, rebellious teen, frugal young housewife, blossoming professional - there is one constant: her passion for good food. Along the way we meet a crazy cast of characters, and each chapter is peppered with meaningful recipes from that point in her life. Tender at the Bone is a fabulous fusion of autobiography and cookbook; I was frankly jealous of her amazing culinary experiences, and yet at the same time grateful that she has written them down for us to share. If you love to cook and eat, don't wait any longer to read this book.

Mom's Mac and Cheese

Mom's Mac and Cheese

2 cups cooked macaroni (about one cup dry)
1 cup assorted, cubed cheese
milk
salt
pepper
bread crumbs (optional)

In a lightly-greased casserole dish, mix the macaroni with the cheese. This dish works best with a mix of different cheeses; I usually use three (e.g., swiss, sharp cheddar, jack). Pour in the milk until you can see it start to rise up through the macaroni - about halfway up the dish. Salt and pepper and if you want, sprinkle bread crumbs on top. Bake for about 30 minutes ina 350 degree oven, or until all the cheese is melted and gooey and the top is golden.

Wednesday, April 8, 2009

I've been a bad, bad blogger.

Yes, I've been slacking on the blog front. There's just a lot going on; my newest freelance client asked me to work for them in-house, full-time for about a month or so this spring, so I'm scurrying to make headway on other freelance projects before that starts, since I'll be in an office forty hours per week for the first time in a long time. I'm really excited for the change of pace; I'll get to work on some interesting projects and put on real clothes and speak with someone other than my cat.

Anyway, I just wanted to pop in and drop a few photos before I put up some more substantial posts later this week.

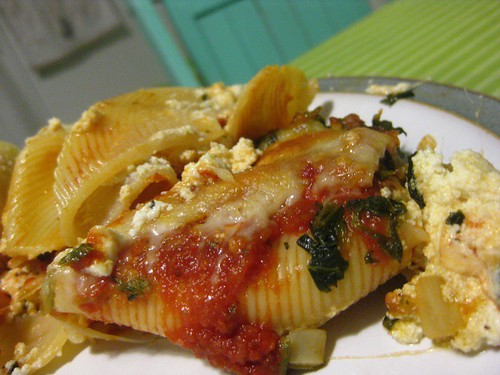
If you've been reading Choice of Pies, you know about my culinary slump, and the great news is I'm finally starting to crawl out of it. I decided, in a fit of frustration, to go back to the basics, and that has helped a lot. Over the past couple of weeks, I've made a few dishes that used to be old standbys for me that somehow dropped out of the rotation. Like stuffed shells:


The filling is so easy: low-fat ricotta, part-skim mozzarella cheese, maybe some parmesan or asiago if you have it, an egg, and some dried Italian herb blend (or fresh herbs, if you have them). I had some leftover spaghetti sauce that I used, but since there wasn't much of it, I sauteed a bunch of frozen spinach and mixed it in to stretch the sauce. I stuffed the boiled shells, topped them with my "Florentine" sauce, and sprinkled some mozzarella on top, then baked it at 375 for about half an hour. Easy, not very expensive, and very tasty served with a big green salad; Dan was thrilled.


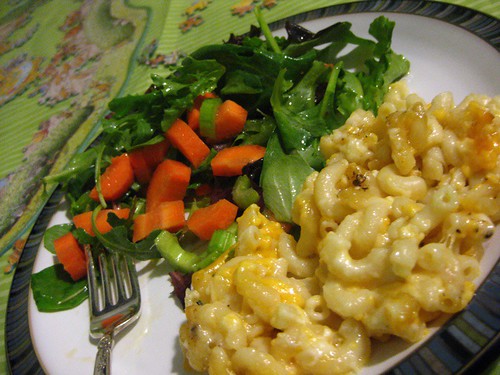
I also made one of Dan's favorites: my mom's mac and cheese. It's the easiest mac and cheese ever - one dish, no white sauce - and it comes out perfectly every time. I'll post the recipe tomorrow. This is not the healthiest recipe I've got, but it's delicious and worth it and since almost all my dinners are low-fat I figure I can splurge once in a while.


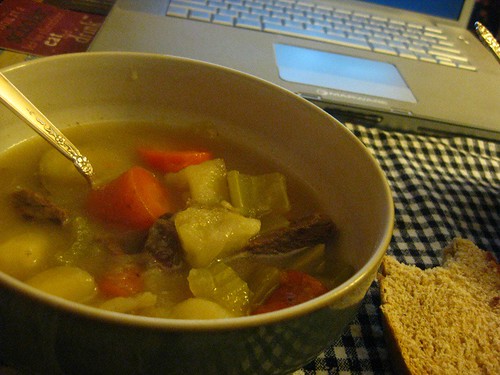
And lastly, that old classic beef stew: perfect for the drizzly mud-season weather we've got now. I made this on Saturday afternoon, while we stayed home and watched movies; the whole house smelled great as it bubbled away, and I let it cook so long that the meat was falling-apart tender. We ate it while watching another movie (on Dan's laptop, since our DVD player is broken) and enjoyed sopping up the broth with spiced Ethiopian honey bread that we had picked up that morning at the farmer's market. I'm going to have to look for a recipe, because that bread was tasty.

So there you have it: there is a light at the end of my takeout tunnel, and I'm finally crawling out of this slump. Check back tomorrow for Mom's mac and cheese recipe and a review of a great food memoir that I read recently.

Thursday, April 2, 2009

The Best-Laid Plans...

So, as I mentioned last week, I've tried a few different techniques to shake myself out of my kitchen slump. One thing I've tried is to write down a meal plan in advance. So early last week, I brainstormed a list of about four dozen meals I can cook without a recipe (more on that later) and set to work on filling out a weekly meal plan.

The thing about a meal plan is, the planning doesn't end once you've filled in a little chart. Take last Saturday for example: I had written "squash casserole" in the box for that night. There's a feta, pepper, and squash casserole from The New Moosewood Cookbook that Dan and I absolutely love - it's amazing with pilaf or warm pitas, and it hits a dinner grand slam: tasty, easy, healthy, cheap.

So great - squash casserole it is for Saturday night. Cut to Saturday afternoon, when I realize that I didn't get the feta - or the pepper - so it's going to be hard to make it for dinner in a couple of hours.

No problem - we were planning to go to the grocery store that night anyway; we would go sooner rather than later. We go and we get various things for dinner tonight and the next few days, sticking to our shopping list (for the most part). Once we hit the checkout and we start loading the conveyor belt with all our yummy groceries, it hits me: I didn't thaw the frozen squash. "Oh, shoot!" I tell Dan, and he shrugs while I momentarily debate whether I could make something else with what we're already buying or whether I should pick up something else right now.

"I guess I'll just cook the squash before I make the casserole," I say. It's an extra step - since the frozen squash is precooked, I usually just thaw it, but I can heat it in a pan with a little water. But no big deal - that adds, what, ten minutes to the overall cooking time? It's okay. It's Saturday. We have no place to be, and we're going to have our favorite casserole for dinner.

At home, we lug all our groceries up to our third-floor apartment and I start unpacking while Dan immediately zeroes in on the sink full of dirty dishes. I put everything away except for the red pepper and the feta for dinner. I start pulling the other ingredients - plain yogurt, sunflower seeds, frozen green peppers. And the squash - where's the damn squash?

Normally I keep my freezer pretty organized - veggies on one side, meats on the other, fruit and juices in the front, tiny Tupperware tubs of tomato sauce on the right next to my frozen homemade pizza dough - but lately I haven't really stuck to this scheme and the whole thing has fallen in to disarray. So I start shuffling through, and pulling things out and setting them on the kitchen table, until suddenly, the table is full and my freezer is empty. And still no squash.

And then I realize - I've had the same box of grocery-store frozen squash in the freezer for a few months now. It kept getting pushed away as I used the homemade frozen packets that I put aside when we couldn't keep up with the endless stream of CSA squash last fall. Why use the boxed stuff when we had the local, organic kind? And then we used the last of the CSA squash in January, and still the lone box sat in the freezer.

Until I cooked it a month ago to eat with - chicken, pork chops? I don't remember. But the key point: A MONTH AGO. I had been planning all week to cook a meal based on a box of squash that had ceased to exist weeks before.

We got Chinese food from the place down the block.

Wednesday, April 1, 2009

Turkey Ragu Recipe

Here's the turkey ragu I made up during the March Daring Bakers challenge.

TURKEY RAGU
2 tablespoons olive oil
3 shallots, minced (or equivalent amount of any onion)
1 large carrot, minced
2 stalks celery, minced
1/2 pound ground turkey
2 hot Italian turkey sausages
20 slices turkey pepperoni, minced
2 cups hot turkey, chicken, or vegetable stock
4 whole canned tomatoes
2 tablespoons pureed tomato (optional - I was just trying to use this up, so I threw it in there)

Heat olive oil over medium in large skillet (regular, not non-stick, if possible). Add shallots, carrot, and celery and cook until vegetables start to soften. Add ground turkey and sausage, breaking up as much as possible. Once meats are cooked through, lower heat to medium-low and add minced turkey pepperoni. Cook until ground meats take on a faint golden-brown hue, stirring occasionally. You probably have a brown glaze on the bottom of the pan and some meat might be sticking. Transfer meat and vegetables to saucepan, then add half a cup of stock to skillet and scrape as much of the brown glaze up as possible, stirring it in to the stock. When you've got the pan pretty well scraped, dump the stock and brown stuff in to the saucepan with the meats and vegetables. Simmer over low heat until almost all liquid is absorbed. Add remaining stock to the saucepan 1/2 cup at a time, simmering until almost totally absorbed after each addition. Break up meats as much as possible every time you stir more stock in. Once almost all stock is absorbed, add tomatoes and break them up as much as possible. Simmer for another ten to fifteen minutes.