Showing posts with label baking. Show all posts

Saturday, February 28, 2009

Daring Bakers: Chocolate Valentino with Ice Cream

Here it is - my first Daring Bakers challenge result!


The February 2009 challenge is hosted by Wendy of WMPE's blog and Dharm of Dad ~ Baker & Chef. They have chosen a chocolate valentino cake by Chef Wan, a vanilla ice cream recipe from Dharm, and a vanilla ice cream recipe from Wendy as the challenge.


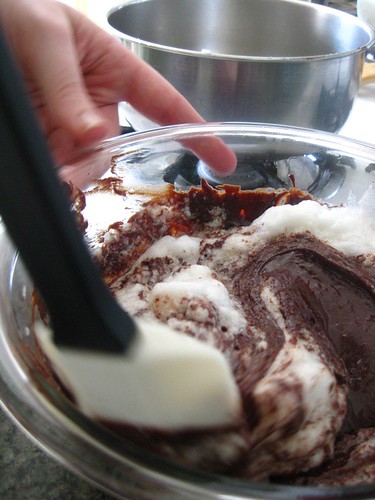
The flourless chocolate cake requires only three ingredients - chocolate, eggs, and butter - and pretty much tastes exactly like the chocolate that you use. I selected Scharffen Berger 70%, which is dark and not very sweet, with subtle fruity hints. The cake is supposed to be very dense and fudgy, but I'm sorry to say mine came out rather dry. There could be a few reasons for this. I've heard that the cake is best after sitting for a day, but I ate my first serving the day I made the cake, and my second serving straight out of the fridge. Other servings (which we gave away) that weren't straight out of the refridgerator looked a bit more moist, but I can't say for sure. The other possible cause for the dryness might be the egg whites; the recipe calls for stiff peaks, which I thought I had, but notes that overbeating may cause a dry cake. I guess my peaks should have been a little softer.


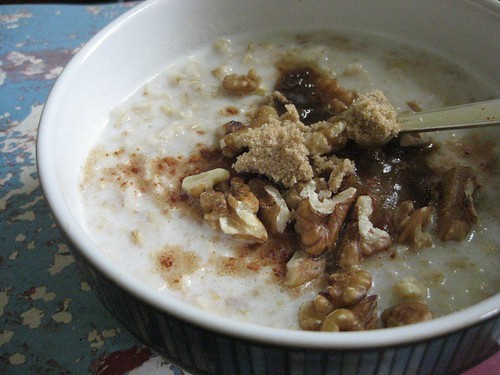
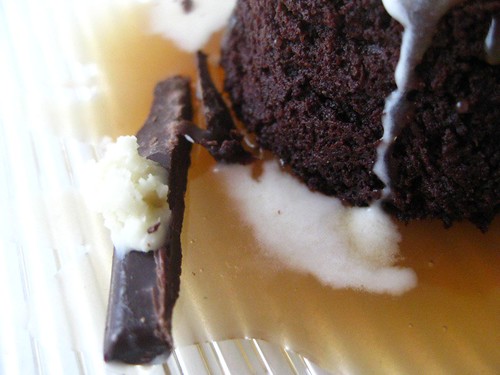
The challenge hosts, Wendy and Dharm, each provided a vanilla ice cream recipe (one custard-style, one Philadelphia-style), but they also stated that we didn't have to make vanilla - we were free to experiment. I made a custard-based coffee ice cream (since Dan loves coffee!). I hobbled together a recipe (included below) after looking at dozens of non-coffee recipes (every coffee recipe I could find used instant - yuck!). After spilling half of the ice cream mix (oops), I dumped the rest in my ice cream machine only to discover that the motor had died. It wasn't completely gone - a sickly hum emanated from somewhere within - but it couldn't summon the power to turn the paddle, so it was useless. I had to pour the mix in to a Tupperware container and use the old "take it out of the freezer to stir every half hour" method, which worked fine, but it wasn't as smooth as it would have been with a machine.


I also made a bourbon caramel sauce, which was fantastic. I used Bulleit, which has undertones of tobacco and coffee, so it worked very well with the coffee ice cream. The caramel sauce is the subject of my next video, which will be posted here Monday, so come back then for the recipe. (If you haven't seen the first video, click here to watch it.)


CUSTARD-STYLE COFFEE ICE CREAM
2 cups heavy cream, divided
1 cup 2% milk
1/2 cup sugar
2 eggs
3/4 cup coffee

Put milk, sugar, and 1 cup of the cream in a saucepan and cook over medium heat until just before boiling. Do not let it boil! Remove from heat and let cool for five minutes. In a small bowl, whisk the eggs, then slowly add a small amount of warm milk mixture (about 1/2 cup) while whisking rapidly to temper the eggs. Add egg mixture to the saucepan with the remaining milk mixture and stir. Return to moderate heat and cook (without boiling) until thick enough to coat the back of a metal spoon. Remove from heat and stir in coffee and remaining cream. Place custard in refridgerator for several hours or overnight. For freezing, if using a machine, follow manufacturer's directions; to freeze without a machine, follow David Lebowitz's directions here.
The February 2009 challenge is hosted by Wendy of WMPE's blog and Dharm of Dad ~ Baker & Chef. We have chosen a Chocolate Valentino cake by Chef Wan; a Vanilla Ice Cream recipe from Dharm and a Vanilla Ice Cream recipe from Wendy as the challenge.

Friday, February 27, 2009

The Most Important Meal

Remember how your parents and teachers would say that breakfast is the most important meal of the day? I firmly believe this. Chances are you haven't eaten in at least eight hours - of course you need to refuel! I'm always ravenous in the morning, so I start almost every day with oatmeal. I always add milk (to boost the protein), and usually fruit and nuts. Some of my favorite combos are dried cranberries and almonds or applesauce with cinnamon and walnuts. I hardly ever use brown sugar or maple syrup anymore - fruit is usually sweet enough. I always use old-fashioned oats, not quick or instant, which cook faster because some of the fiber is removed; old-fashioned oats take only a few more minutes (about five, as opposed to two or three) but they have a lot more fiber so they will keep you sated for longer.


On weekends, however, I try to make something a little special, and I'm a little more lenient on the health front. One of my favorite breakfast treats is the popover. I've written about these before; they still fall flat some days (as seen below) but they taste just as lovely. I like to put out a platter of popovers, a pot of tea, and some toppings like butter and jam. (Once we used lemon curd, which was spectacular!) One recent Sunday morning, we slathered our popovers with Stonewall Kitchen Blackberry Jam, a gift from our landlords (hi Holly!). This jam was so delicious that we used it all up within six weeks - it usually takes us a year to use up any given pot.

See the Yahtzee score sheet in the background? This is the other part of our weekend breakfast ritual. We've fallen in to the wonderful habit of playing Yahtzee while we eat on weekend mornings. It's a nice game of chance and strategy, and it takes us back to our first year of marriage, when we played endless rounds of Yahtzee, Uno, and Sequence on the fold-up table in our shoebox-sized studio apartment in London.


Here are some chocolate-chip pancakes - a very rare indulgence. I actually haven't made pancakes in quite a while because we're just about out of maple syrup and I've held off on buying more since the next sugaring season is just a few weeks away. We've actually been invited to a maple sugaring weekend in Vermont, which I'm really excited about.

Have a great weekend, and check back here tomorrow for the big reveal of my first Daring Bakers challenge!

Thursday, February 12, 2009

Valentine's Cookies

As promised, here are some pictures of the cookies I made this week. Rolled sugar cookies (using this recipe) with vanilla glaze, royal icing motifs, and piped buttercream. I had so much fun making these! I need to do this more. Enough blather - I'll let the pictures do the talking.


Have a great weekend, everyone!

P.S. To see more of my cookie photos, click here.

Monday, January 5, 2009

Scones Are Simple

If you look at the new banner above you'll see a close-up of one my homemade scones. Scones are actually really easy to make and require only a handful of ingredients. My super-easy customizable recipe follows; have fun experimenting with different flavors and let me know what your favorites are (I like almonds, dried cranberries, almond flavoring, and orange zest).


SARAH'S ANY-FLAVOR SCONES
1/2 c. butter, COLD
2 c. flour
2 tsp. baking powder
1/2 t. salt
3/4 c. milk
flavorings of your choice

Preheat oven to 400.

Cut together butter and flour into a fine meal. You can leave it coarser if you want; it makes for a more crumbly scone.

Stir in baking powder, salt, and any dry flavorings (i.e. nuts, citrus zest, dried fruit, chocolate chips, ground tea leaves - whatever you can think of!).

Add any liquid flavorings (e.g., vanilla or almond extract) to the milk. Make a well in the dry ingredients and add the liquid. Stir just until the dough comes together.

Now comes the time to make a decision: do you want crumbly scones, like you get in American coffee shops? Or do you want a fluffier scone, which is more English-style?

For crumbly scones, immediately turn dough on to a floured surface and knead about eight times. Do not over-knead! Form into a cirle, about 3/4" thick, and slice into six or eight triangles. Separate the triangles and place them on a lightly-greased cookie sheet and bake 20-25 minutes, or until lightly golden brown.

If you want fluffier scones, you can knead immediately a lot more than 8 times, or you can take the lazy route and let the dough sit for 25-30 minute before kneading 8 times. The more you knead it (or the longer you let it sit), the more the gluten gets activated, the more fluffy and less crumbly the scones will be. Form in to triangles and bake as described above.

Serve with butter, jam, lemon curd, or clotted cream. Enjoy!


Monday, December 22, 2008

Year in Review: Thanksgivings

When it comes to holidays, we are a family cemented to tradition. Change and innovation do not come lightly. Something as a simple as the suggestion of a change to the Christmas Eve menu has been known to cause actual rioting. So it's no surprise that on Thanksgiving, our table has always been filled with traditional fare: turkey, of course, plus gravy, mashed potatoes, sweet potatoes, turnips, cranberry sauce, dinner rolls, and roughly one 9" pie for every two people in attendance. Delicious, indulgent, tryptophan-triggering? Of course. But I felt something was missing: the color green. So I asked my mom, who hosted this year's get-together, if I could bring brussels sprouts.


As I mentioned in my review of The Harrison, I love brussels sprouts. This is not an enduring affection but rather a newfound passion, still young and bright and wallowing in the puppy-love stage. You see, prior to this fall, I had never tasted brussels sprouts. Never. But we got some in our CSA one week and for me, it was love at first bite.

For Thanksgiving, I sliced three pounds of loose sprouts in to halves and roasted them with a little olive oil at 400 degrees for about forty minutes. The outsides turn dark, nearly black, but the inside becomes a soft, creamy treat. I tossed the roasted sprouts with crisped pancetta, grated parmesano-reggiano, and some lemon juice. The sprout eaters at the table were very satisfied, and I got to eat the leftovers for days.

Incidentally, this year there was another green dish: Aunt Liz's spinach casserole, which is absolutely delicious. I'm going to get the recipe from her and will write about it in a separate post soon after I do.

You may have noticed the s in the title and thought it a typo. It's not; this year, we were blessed with two Thanksgiving dinners, as my in-laws decided to push their celebration up a few weeks and have a Thanksgiving dinner with all the trimmings in late October, to coincide with a visit from Great-Aunt Rose. The menu was similar to that at my mother's, with a few variations. Lynn, my mother-in-law, makes an awesome homemade cranberry sauce (while my side of the family is married to the canned kind). Also, because Lynn is Armenian, instead of mashed potatoes, she serves pilaf. (Pilaf holds a very special place in my husband's heart, so years ago I secured his mother's/grandmother's recipe; when he asks what's for dinner and my response includes pilaf, I'm guaranteed praise for days.)


For this early Thanksgiving dinner, I made a carrot cake with cream cheese frosting and busted out my piping tips to add some old-school decorations. The pattern was not planned: I just went where the frosting took me, which was apparently back to the 1970s, as the bright orange frosting, inspired by the frosting carrots that top bakery carrot cakes, reminds me of nothing more than the orange formica countertops in the chalet my family once owned.

The carrot cake (based on this recipe -- I skipped the pineapple and used whole wheat flour) was moist and delicious and I had fun making it. My decorating skills have deteriorated, though, so I might have to start using my piping tips more often.


Monday, November 17, 2008

Popovers That Didn't Pop


At least once every weekend, I try to make something a little special for breakfast. Popovers are one of my favorite treats to make as they require very few ingredients, take only a few minutes to whip up, and are delicious with butter, jam, and a pot of tea. You have to be careful not to open the oven while they are cooking, as that will make them fall flat, and when you do pull them out, you're supposed to immediately pierce each one with a fork to let the steam out so they don't collapse. Sometimes, though, they fall anyway.


I've heard it helps to have the eggs and milk at room temperature before you mix up the batter; if they are too cold to start with, they just can't get and stay puffy. This time, I was impatient and took the ingredients straight from the fridge, so my popovers didn't pop. At least they still tasted wonderful.

For a simple popover recipe, go here. A note about pans: some people have special popover pans. Even though I sometimes go on popover sprees and make them several times over the course of a few weeks, I just can't justify another specialized piece of kitchen equipment, so I use a muffin tin. It works just as well (as long as you have the patience to make them properly).


Tuesday, October 7, 2008

pumpkin bread

I have an absurd love of pumpkins. As autumn rolls in and all of a sudden piles of pumpkins pop up along these country roads, I become giddy and can't help but squeal, "Look! PUMPKINS!" every time we pass a patch. To me, they are the most beautiful vegetable. I love their rotund form, their twisting stumps, and their relentlessly bold color. No wallflowers, pumpkins declare themselves proudly.

For several years, starting when I was around eight years old, I had a backyard vegetable garden. One year I grew pumpkins. I got a small crop and picked most of them, but left the largest one on the vine to get bigger. Every day I went out to check on it and decided to let it grow just a bit longer. Finally one morning I decided it was time, but when I went out to the garden, my pumpkin was gone. Fat and happy the day before, it had been attacked by slugs in the night. All that remained was the stump and a few sad, stringy seeds. It was an important lesson: patience may be a virtue, but hesitation can get you screwed.

As much as I love pumpkins, I rarely bother with roasting them and scooping out the sweet flesh. Why go to all that trouble when the canned puree is flavorful, perfectly smooth, and cheap? I always get the plain pumpkin, not the pie mix with all its added sugars and spices, because I prefer to spice it myself and I actually rarely make pie. My three favorite things to make with canned pumpkin are pumpkin ravioli, curried pumpkin soup, and pumpkin bread.

I made the season's first batch of pumpkin bread last Friday using the recipe from my circa 1970 Betty Crocker cookbook, which I picked up in a thrift store just before moving in to my first apartment. The recipe, which uses one 15oz can or half a large can of pumpkin, makes two 8" loaves. The bread is so irresistible that the two of us could easily go through a whole loaf in a day or two, so I split the batter among four mini loaf pans and freeze some. Later in the season we can pull one out of the freezer at night and have it ready for breakfast in the morning.

Wednesday, August 6, 2008

first time - cinnamon buns

Dan's first day back to work was Monday. He asked me to bake a thank-you cake for his co-workers, since they had sent him a nice plant when he was stuck at home recovering. I figured that as long as the oven would be heating up the kitchen anyway, I might as well bake something for us, too. I decided to try cinnamon buns.

I absolutely love to bake, but I usually avoid things that require yeast. Patience is not one of my stronger traits. I found this recipe and while it did take me a bit more than ninety minutes start to finish, overall it really wasn't that hard and I was quite satisfied with it. I baked some buns in the muffin tin and some in a regular pan; the muffin ones came out perfect, while the others had to be tossed because the filling had leaked out the bottom and turned into a horrible, sticky, black, burnt tar. The one change I would make to the recipe would be to add a lot more cinnamon - at least double. I would have done it this time but we had exactly a tablespoon left and not a speck more. Also, cream cheese icing would be best - isn't it always? - but I didn't have neufchatel on hand. Instead I made a basic glaze and added a bit of almond flavoring.

The empty spot on the plate above came about because Dan couldn't wait for me take photos before grabbing one. I certainly can't blame him. Let's go in for a close-up:
Mmmmmmm, yummy! Definitely worth the effort.